How to Make Confetti Cones for Happy Birthday Decorations
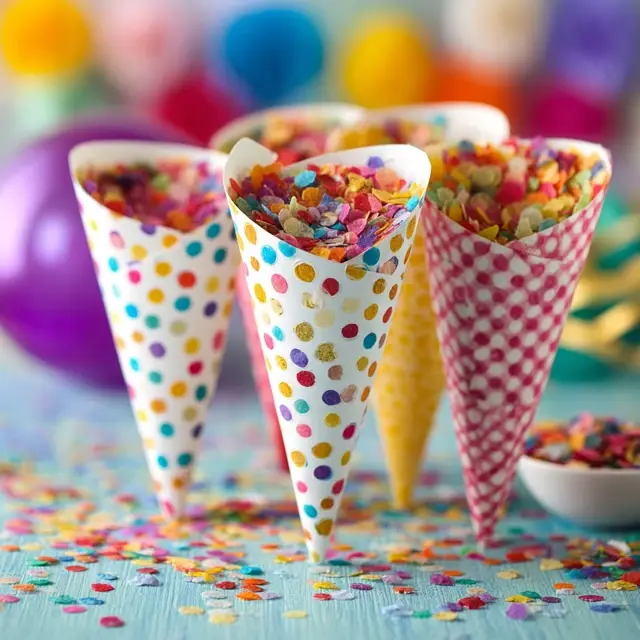
Confetti brings instant joy to any party, and when paired with personalized cones, it becomes both a decoration and a fun activity. Creating your own confetti cones is an affordable and creative way to elevate your Happy Birthday Decorations. They’re easy to make, highly customizable, and guaranteed to delight guests of all ages.
Why Confetti Cones Are Perfect for Parties
Confetti cones add both style and function to your party setup. They serve as decorative accents while also giving guests a festive surprise to throw during special moments like singing “Happy Birthday.”
- Interactive: Guests can participate in the celebration with confetti tosses.
- Customizable: Choose cone designs and confetti colors to match your theme.
- Affordable: Made with simple materials like paper and tissue confetti.
- Dual Purpose: Functions as both decor and entertainment.
Materials You’ll Need
Gather these supplies before getting started:
- Decorative paper or cardstock
- Tissue paper or metallic sheets (for confetti)
- Scissors or craft punch
- Glue, tape, or double-sided adhesive
- Ribbon or twine (optional)
Step-by-Step Guide to Making Confetti Cones
1. Cut the Paper
Start with a square piece of decorative paper or cardstock. Choose colors or patterns that match your birthday theme.
2. Form the Cone
Roll the paper diagonally into a cone shape. Adjust the tightness depending on how large you want the cone opening to be. Secure the edge with glue or tape.
3. Make the Confetti
Cut tissue paper or metallic sheets into small squares or use a craft punch for circles and stars. Mix colors for a vibrant look.
4. Fill the Cone
Place the confetti inside the cone, filling it about three-quarters full. Too much confetti can make it spill prematurely.
5. Add Finishing Touches
Tie a ribbon around the cone or add a custom label with the birthday person’s name for a personal touch.
Creative Uses for Confetti Cones
- Guest Favors: Place cones at each table setting for guests to use.
- Photo Moments: Hand out cones for a coordinated confetti toss during pictures.
- Table Decor: Display cones upright in jars or baskets as part of your table setup.
- Cake Ceremony: Give cones to guests to toss confetti as the birthday cake is presented.
Styling Tips for Confetti Cones
- Match paper patterns with your DIY banners for consistency.
- Use metallic confetti for a glamorous look.
- Choose biodegradable tissue confetti for eco-friendly celebrations.
- Layer cones in baskets with flowers for a decorative display.
Final Thoughts
Confetti cones are a small detail that can make a big impact on your Happy Birthday Decorations. They add color, fun, and interactive excitement to your party, ensuring that your celebration feels joyful and unforgettable. With just a few supplies and a little creativity, confetti cones can become the highlight of your DIY birthday decor.
